
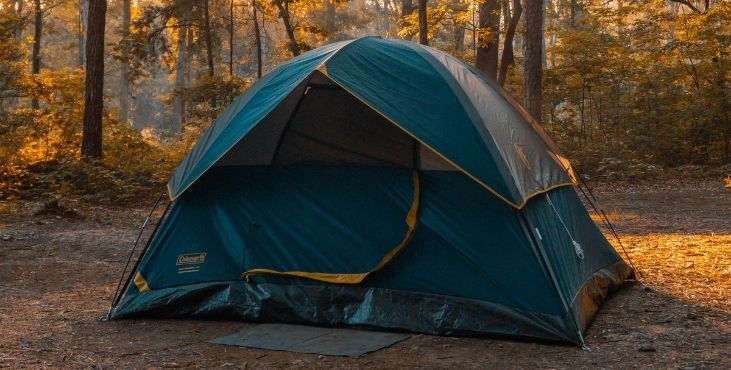
Nothing takes the shine off a camping trip than getting soaked to the skin. Walking through the great outdoors in pouring rain is uncomfortable to say the least, but once you get your tent set up and a decent fire going, you soon warm up, dry out and forget about getting soaked. But what if your tent starts to leak too?
Your only refuge from the weather, your safe haven from stormy skies has suddenly become part of your problem. There’s nothing you can do about it now, you’ll just have to suck it up ‘til morning. If you have a spare tarp, you could extend that over the flysheet, tie it down and hope for the best.
Contents
Why Does A Tent Start To Leak?
When you bought your tent, it claimed to have a hydrostatic head of 3,000mm, so why is it leaking now? The answer is probably because you’ve had the tent for a few seasons, and have been using it regularly. Which means the waterproof fabric has lost some if not all of it’s waterproofing.
No fabric is truly, fully waterproof, the fabric used to make tents is water resistant but as it’s breathable, it lets water vapour through but not water droplets. It’s then treated with a Durable Water Repellent (DWR) and that’s what makes it waterproof.
Over time, that waterproof coating gets worn away, oil and dirt particles get forced into the fabric, and the rays from the sun weaken and erode the surface layer. The DWR literally wears out, and the taping that protects the seams also wears out over time and water starts to collect at the seams and eventually seeps through and the first thing you notice is a wet patch. This process of degradation is exactly the same for any waterproof object;
- Tents
- Waterproof Coats
- Waterproof Trousers
- Backpacks
- And Any Other Vessel Made From Waterproof Fabric
What’s The Solution?
Some people will just bin the tent and buy a new one, and that is the easiest option, but we don’t all have that sort of disposable cash laying around. There is a relatively inexpensive way to re-waterproof your tent, all it takes is your time, energy and a few basic supplies.
How Do You Re-Waterproof Your Tent?
The first thing you need to do is find out how and where the water is getting into your tent. The problem is, by the time you’ve noticed a leak, there’ll probably be several leaks. Your first course of action is to closely inspect the whole tent for any signs of a rip, tear or any frayed material. If you’re lucky this could be the cause of your leak and all you’ll need to do is a simple patch job.
If it’s not that obvious where the leak’s coming from you need to be more thorough, wet the ground in your garden, erect your tent on that wet ground and then run a hose over the tent to create similar conditions to a downpour of rain. Then get inside the tent and have a careful look at where the water is entering the tent.
Problem areas tend to be at the seams, around the walls, where the flysheet connects to the inner tent and of course the floor of the tent. Once you’ve found the leak (or leaks) it’s time to start re-waterproofing your tent.
What Will You Need To Re-Waterproof Your Tent?
The main things you’ll need are time, patience and a good eye. You’re going to have to go over every inch of the tent to be sure you get it all. The equipment you’ll need is;
- Soap & Water
You should only ever use a proprietary tent cleaner on a tent. Not detergent or dish soap as these can strip the waterproofing off the fabric. - Cloths (Wet & Dry)
Soft, non-abrasive cloths should be used for drying and a sponge is good for washing. - Seam Sealer
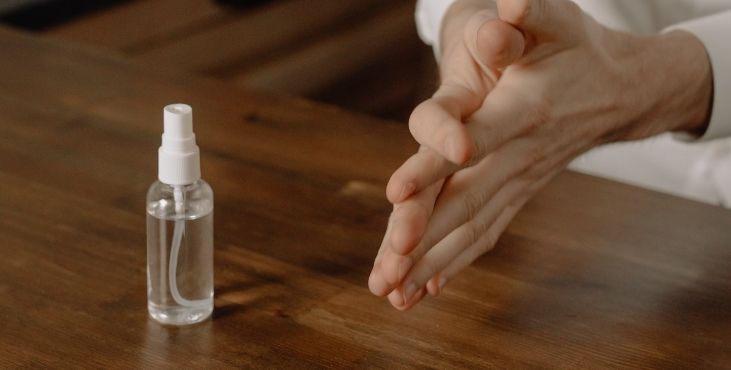
There are many brands available, check online. - Tent DWR Spray
As with the seam sealer there is plenty of choice available - Rubbing Alcohol
Readily available and relatively inexpensive to buy.
How To Make Your Tent Waterproof Again
Once you’ve assembled all of the equipment you need it’s time to get started, so let’s get into it.
Reseal The Tent Seams
Even if the problem isn’t with the seams, there’s little point re-waterproofing everything else and not resealing the seams. Just follow these simple steps;
- Clean Each Seal
Wipe every seam with a wet cloth, then rub each seal with rubbing alcohol to remove all of the old glue. Remove all remaining glue from the seams. - Apply The Seam Sealer
Using a special tent seam sealer, brush into every seam, take care not to apply the sealer too thickly or too thinly, around one millimeter thick is perfect. - Remove Any Excess
Using a dry cloth, carefully remove any excess sealer. - Allow To Dry
Make sure the seams are completely dry before packing the tent away. Let the tent dry either in the shade or in a room indoors.
Once done, your tent seams should remain waterproof for about 8 to 10 years unless you camp in extreme conditions for extended periods of time.
Refresh The Waterproofing On The Tent Surfaces
Once the seams are redone, it’s time to restore the waterproofing capability of the whole tent. This will only take around 30 minutes but it will last for many years, and it’s worth doing even if your tent isn’t leaking. Especially if it’s been used for a few years, prevention is better than cure every time.
This is what you do:
- Set Your Tent Up
Ideally you should set your tent up in your garage, if you don’t have a garage, you can set your tent up in the garden, but check the weather forecast first. You’ll need 24 hours with no rain or damp conditions. - Wash Your Tent
This should be part of your regular routine after any camping trip so we won’t go into details, but it’s vitally important to remove all of the mud, dirt and oils from the whole surface of the tent, before attempting to apply the DWR. Using a cloth or sponge soaked in soapy water, wash every surface of the tent. - Remove All Soap Suds
Using a fresh cloth and clean water, rinse all of the soap from the tent’s surface, don’t worry about drying it. - Apply The Waterproofing Spray (DWR)
Coat the full surface of the tent with the DWR spray all over the outside of the tent. There’s no need to apply to the inside of the tent as the spray will soak into the fabric and stick as it dries.
Apply the DWR in an even coat so that it is all covered with the same amount of spray. Be sure to cover every part of the outside of the tent, don’t miss even a minute area because if you do, it will undermine the effectiveness of the whole tent’s waterproofing. - Allow To Dry
Once you’re sure you’ve covered it all, allow it to dry overnight or for at least 12 hours before packing away. That’s why we said a garage is ideal (but a dry fairly warm night outdoors will do).
That’s it, you’re done, and your tent should now be waterproof again. The next time you take the tent out it won’t matter if it pours with rain. Well, it will, but at least you’ll be sleeping in the dry.
How Often Should a Tent Be Re-Waterproofed?
As the tent is your only protection from the weather, it is important that it remains waterproof, and some people re-apply DWR and seam sealer at the start of every camping season. We can understand why, but it’s not necessary to do it every year. If it’s done properly, the tent should remain waterproof for at least 3 to 5 years (just like it did when it was brand new). We mentioned earlier about backpacks etc, and as long as they are made from nylon or polyester, it makes sense to apply some DWR to these too.
Hydrostatic Head
We mentioned the hydrostatic head earlier on, in case you’re wondering what that means, we thought we’d explain it to you. The hydrostatic head (HH) is a way of measuring how waterproof fabric is, it’s always expressed in millimeters and is used as a guide to how much water a fabric can take before it leaks.
The HH represents how high a column of water would need to be before it pushed through the fabric and thus rendering it as no longer waterproof. The accepted minimum standard level for tents is 1,500mm now that’s a lot of water! But trying to imagine 1,500 millimeters of water sitting on any part of a tent is not only virtually impossible, it’s inaccurate too.
HH refers to the amount of pressure 1,500mm of water would exert on the fabric to force its way through. Plus there are other factors at play here, how wet the fabric was already, wind direction and speed, temperature, and many other factors all play a part.
What Hydrostatic Head Is Best For A Tent?
For a tent to withstand a light shower of rain, it needs a HH of around 1,000mm, heavy rain and strong winds creates more pressure on the tent fabric and so a HH of around 2,000mm is recommended. 3,000mm and above will prevent water pushing through if something really heavy was pushing against the tent fabric, something like a person pressing on it.
That’s why the tent and the groundsheet are often rated separately, because groundsheets get a greater pressure exerted on them, they need to have a higher HH rating, something in excess of 3,000mm is recommended.
Leave a Reply